

How to Set Up a Workflow in Geofence with AirDroid Business?
Welcome to AirDroid Business. To enhance your learning experience, we have created a YouTube video to help you understand this guide better and faster.
Video Tutorial: How to Set up a Geofence on AirDroid Business?
As a device administrator, maintaining security and operational efficiency often involves monitoring the movements of your company's Android devices within specified geographical areas. Automating this process and setting up a workflow that triggers specific actions when a device enters or exits a geofenced area can enhance efficiency.
AirDroid Business's Geofence feature simplifies this task. This guide will walk you through the steps to set up a workflow in Geofence with AirDroid Business.
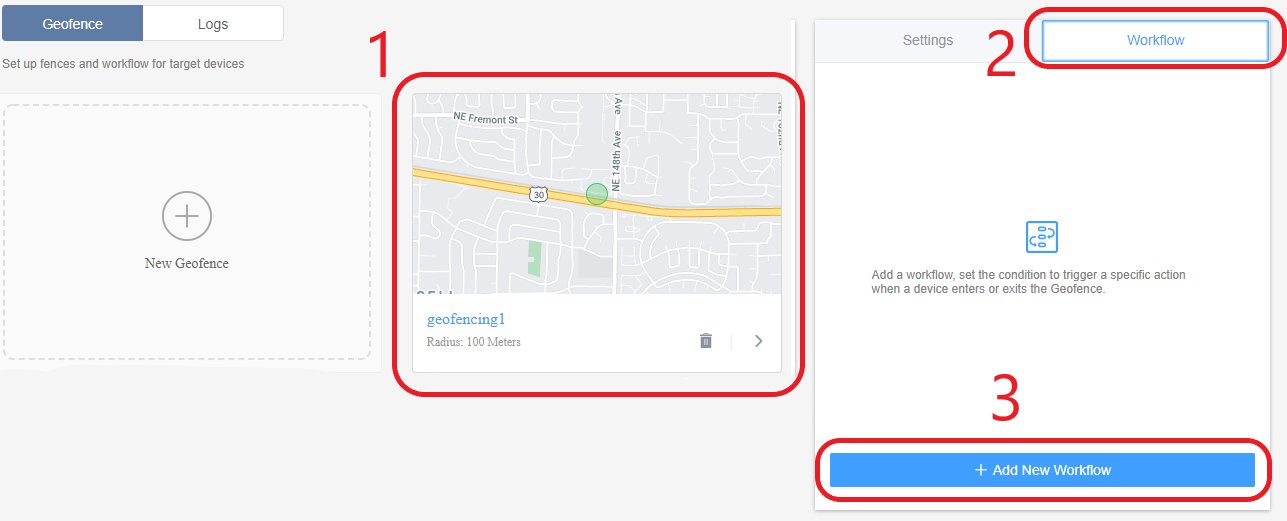
- Step 1Create a New Workflow
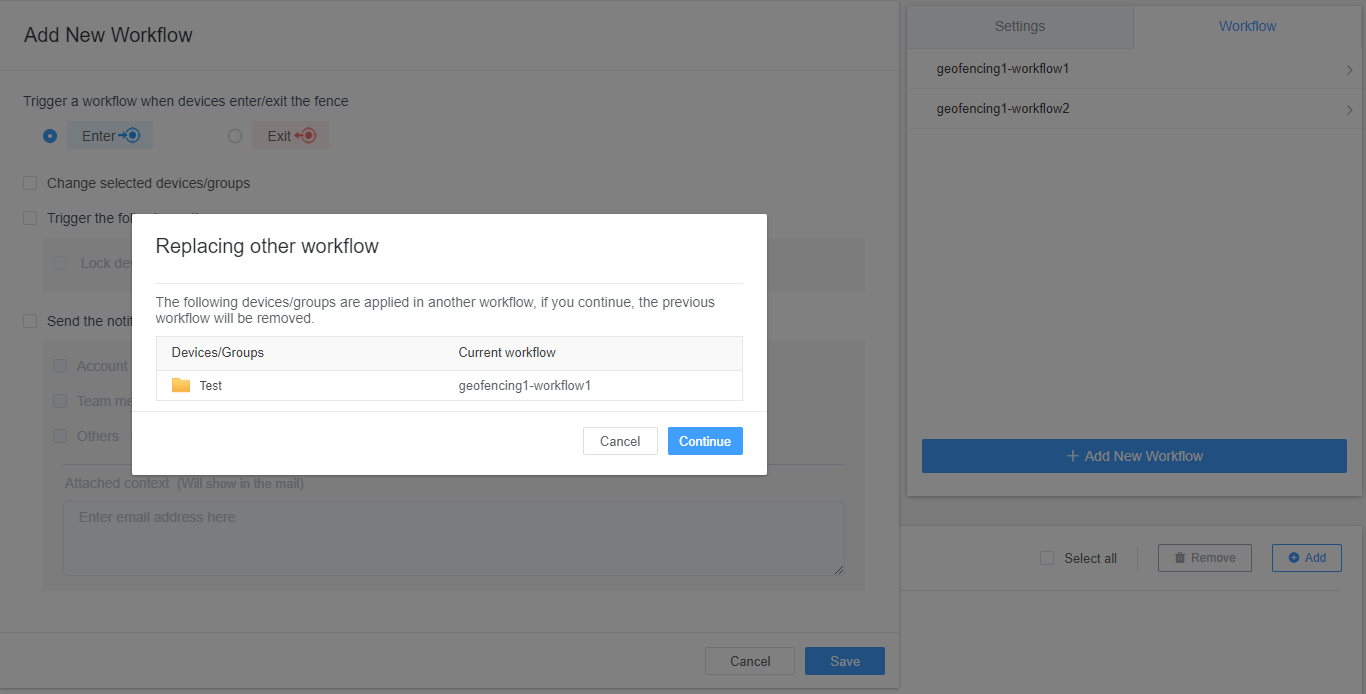
- Navigate to an existing Geofence, switch to the `Workflow` tab next to `Setting`, and click `+Add New Workflow`.
- Step 2Name the Workflow
- Click the

 icon and name the workflow.

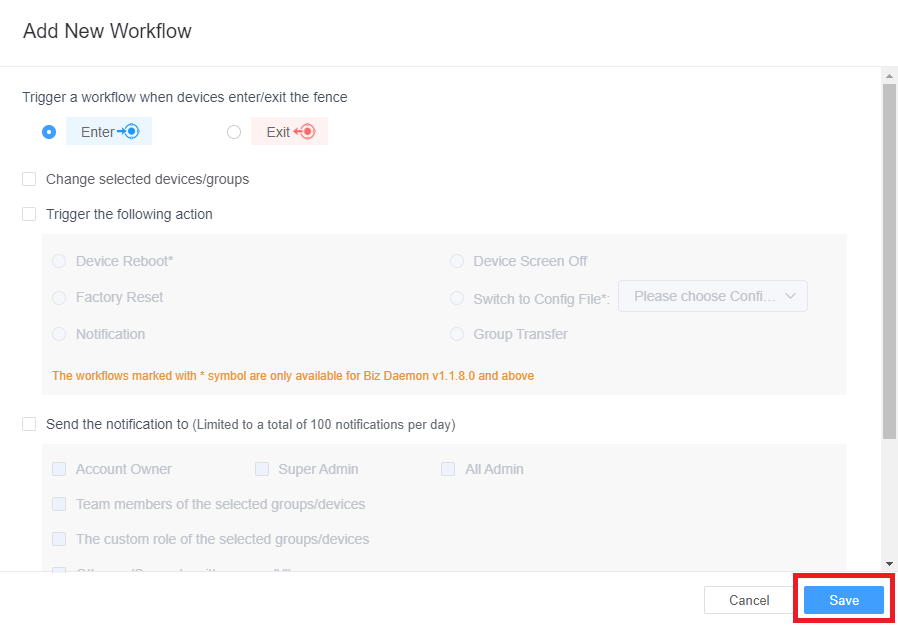
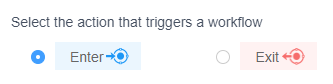
- Step 3Select the Action that Triggers a Workflow
- Choose the action that will trigger this workflow: either entering or exiting the geofenced area.
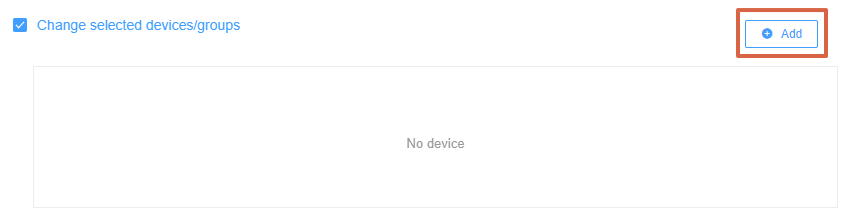
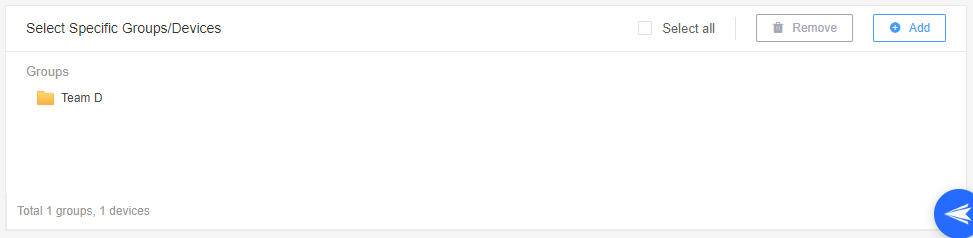
- Step 4Select the Groups/Devices
- Choose the specific devices or groups within the Geofence that this workflow will apply to.

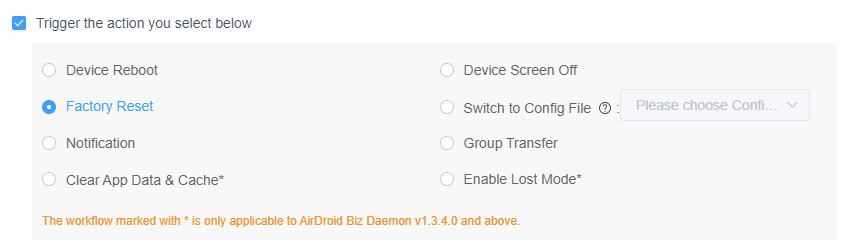
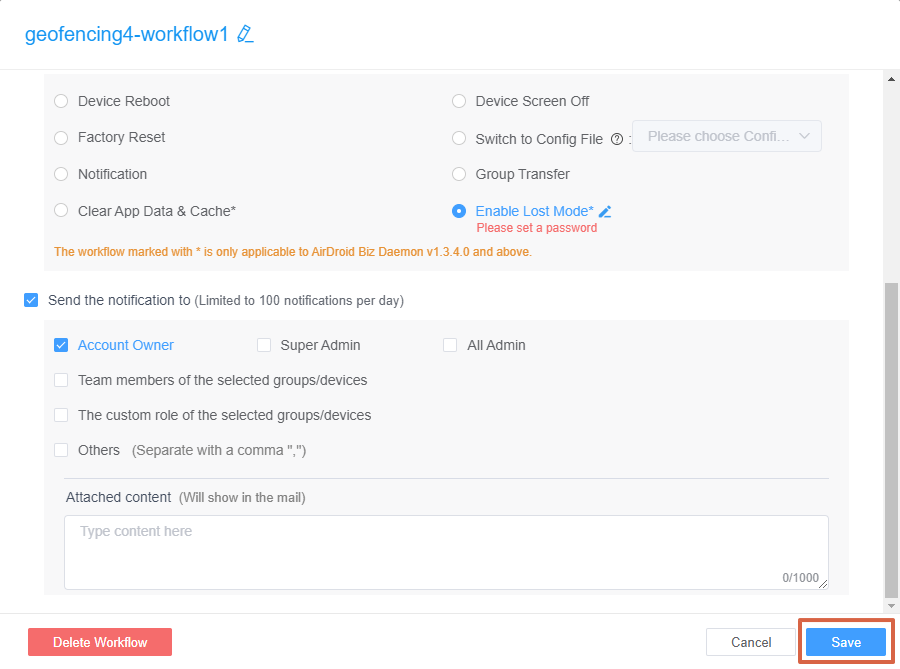
- Step 5Select the Actions to be Triggered
- Various actions can be triggered:
- ● Device Reboot: This action can help you reboot your device automatically when the workflow is triggered.
- ● Device Screen Off:This action can help you automatically turn off your device screen when the workflow is triggered.
- ● Reset factory data:This action can help you reset your device into factory settings.
- ● Switch to Config File: This action can help you switch the Policy or Kiosk config from one to another when the workflow is triggered.
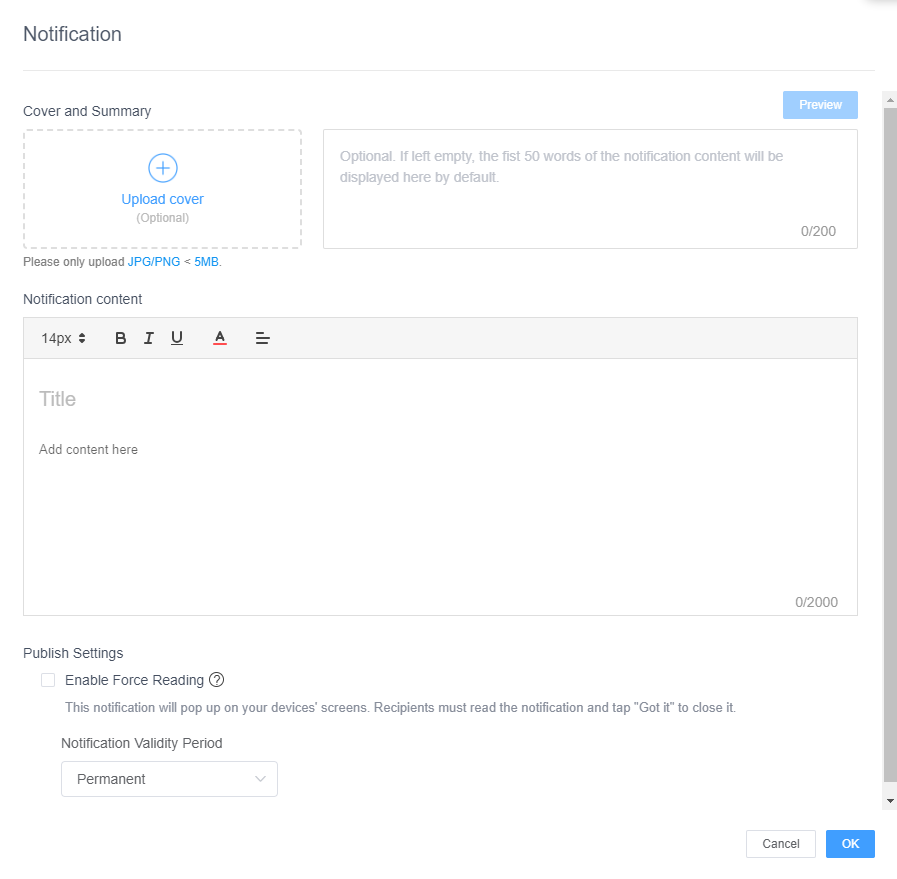
- ● Notification:This action can send a customized message to notify specific users on the device or enforce them to read your message.
- ● Group Transfer: This action can transfer your devices into another group when the workflow is triggered.
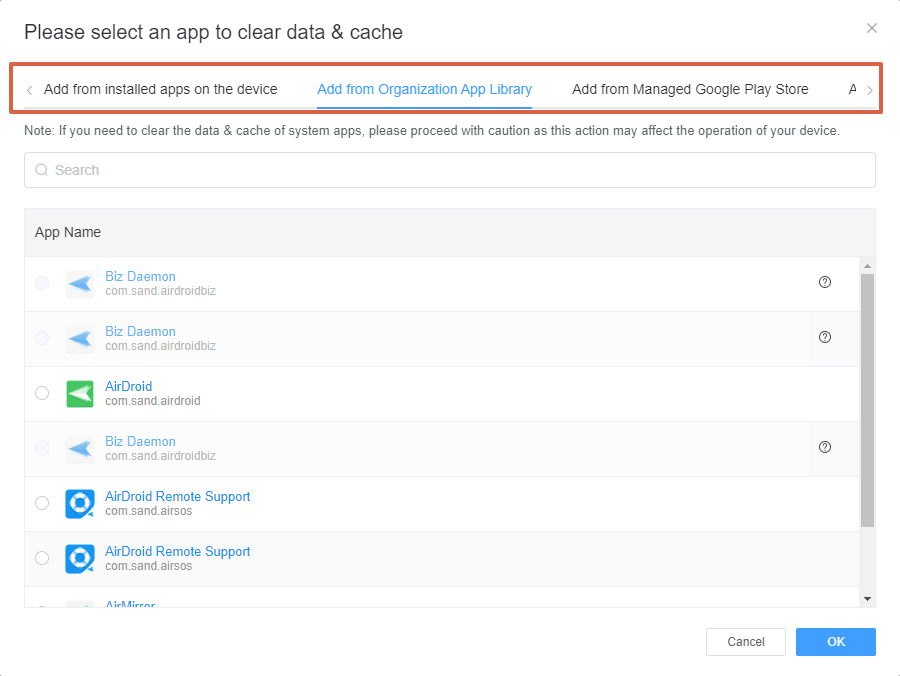
- ● Clear App Data & Cache: You can choose the app you want to clear data & cache when the workflow is triggered.
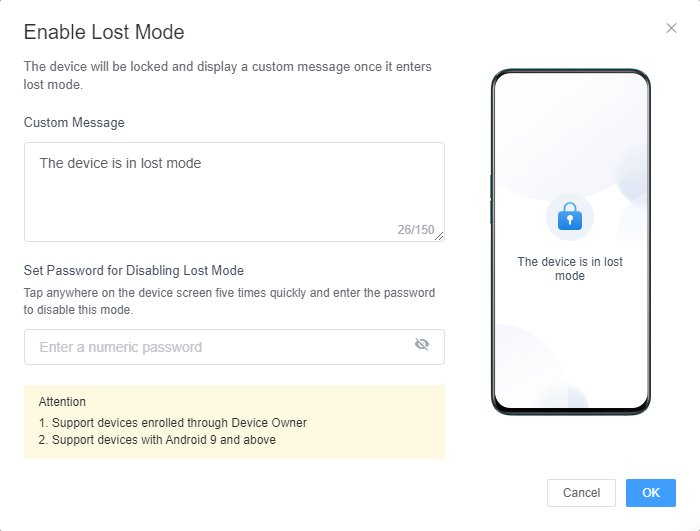
- ● Enable Lost Mode: You can activate the Lost Mode feature. Once enabled, the device will be locked and display a custom message indicating that it's in lost mode.
- Custom Message: You can set a custom message to be displayed on the device when it's in lost mode. For instance, you can set the message as "The device is in lost mode".
- Set Password for Disabling Lost Mode: To disable this mode, tap anywhere on the device screen five times quickly and enter the password.
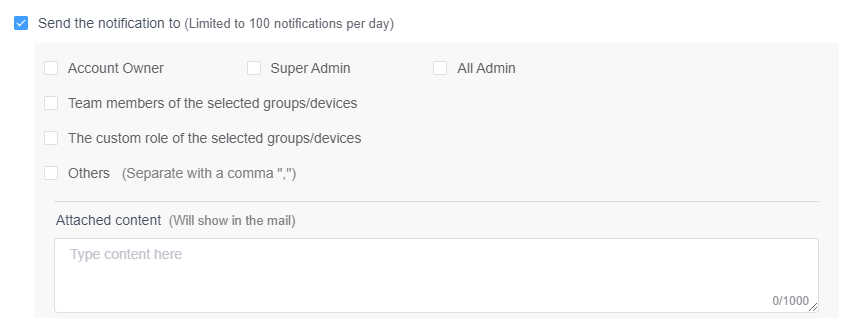
- Step 6Set Up Notifications
- In this step, you'll determine who will receive notifications when the workflow is triggered. You can choose from several options: Account Owner, Super Admin, All Admin, Team Members of the Selected, Groups/Devices, The Custom Role of the Selected Groups/Devices, and Others (You can specify other users to receive the notification. Enter their email addresses, separated by commas.)
- You can also attach content that will be displayed in the email notification.
- Step 7Save to apply the changes
- Click "Save" button to apply the changes.
- You can also attach content that will be displayed in the email notification.

2. It is only applicable to AirDroid Biz Daemon v1.3.4.0 and above.
3. It is only applicable to AirDroid Biz Daemon v1.3.4.0 and above.
2. Support devices with Android 9 and above.
3. It is only applicable to AirDroid Biz Daemon v1.3.4.0 and above.
By following these steps, you can easily set up a workflow in Geofence with AirDroid Business. This not only saves you time but also enhances the security and operational efficiency of your Android devices.
Still need help? Submit a request >>
Related Articles
You May Also Like
- How to Create and Manage Device Groups on AirDroid Business?
- How to invite and manage account members on AirDroid Business?
- How to create a custom role on AirDroid Business?
- How to manage the devices in the Device List?
- How to Use “Batch Operations” to Improve Device Management Efficiency?